This posts contains affiliate links
Hey there, gardening enthusiast! If you’ve been dreaming of growing your own veggies, herbs, or flowers but don’t want to spend a fortune. You’re in the right place. Building a raised garden bed is easier(and cheaper!) than you might think. My job today is to walk you through it step by step. Sprinkle in some personal experience, and even share a few tools and supplies that can make your project a success. But first let us go through the benefits of building a DIY raised garden bed. Lets dig in- pun intended!


- 【Product Size】: Measuring 3x15m outdoor plant cover frost proof and made of rugged non-woven polypropylene fabric, this …
- 【Lightweight Breathable】: Outdoor plant antifreeze cloths are light enough with a stable porous fabric that allows for o…
- 【Plant Protection】: Suitable for long term use, the plant antifreeze cover withstands the test of various climates, has …

- Durable Galvanised Steel Construction: Built to last, our raised beds are forged from galvanised steel, offering superio…
- Effortless Plant Maintenance: The raised design of these beds eliminates the need to bend down or kneel, making plant up…
- Stylish Heritage Green Finish: These beds feature a classic heritage green finish, giving your outdoor space a timeless,…
Understanding the Benefits of a Raised Garden Bed
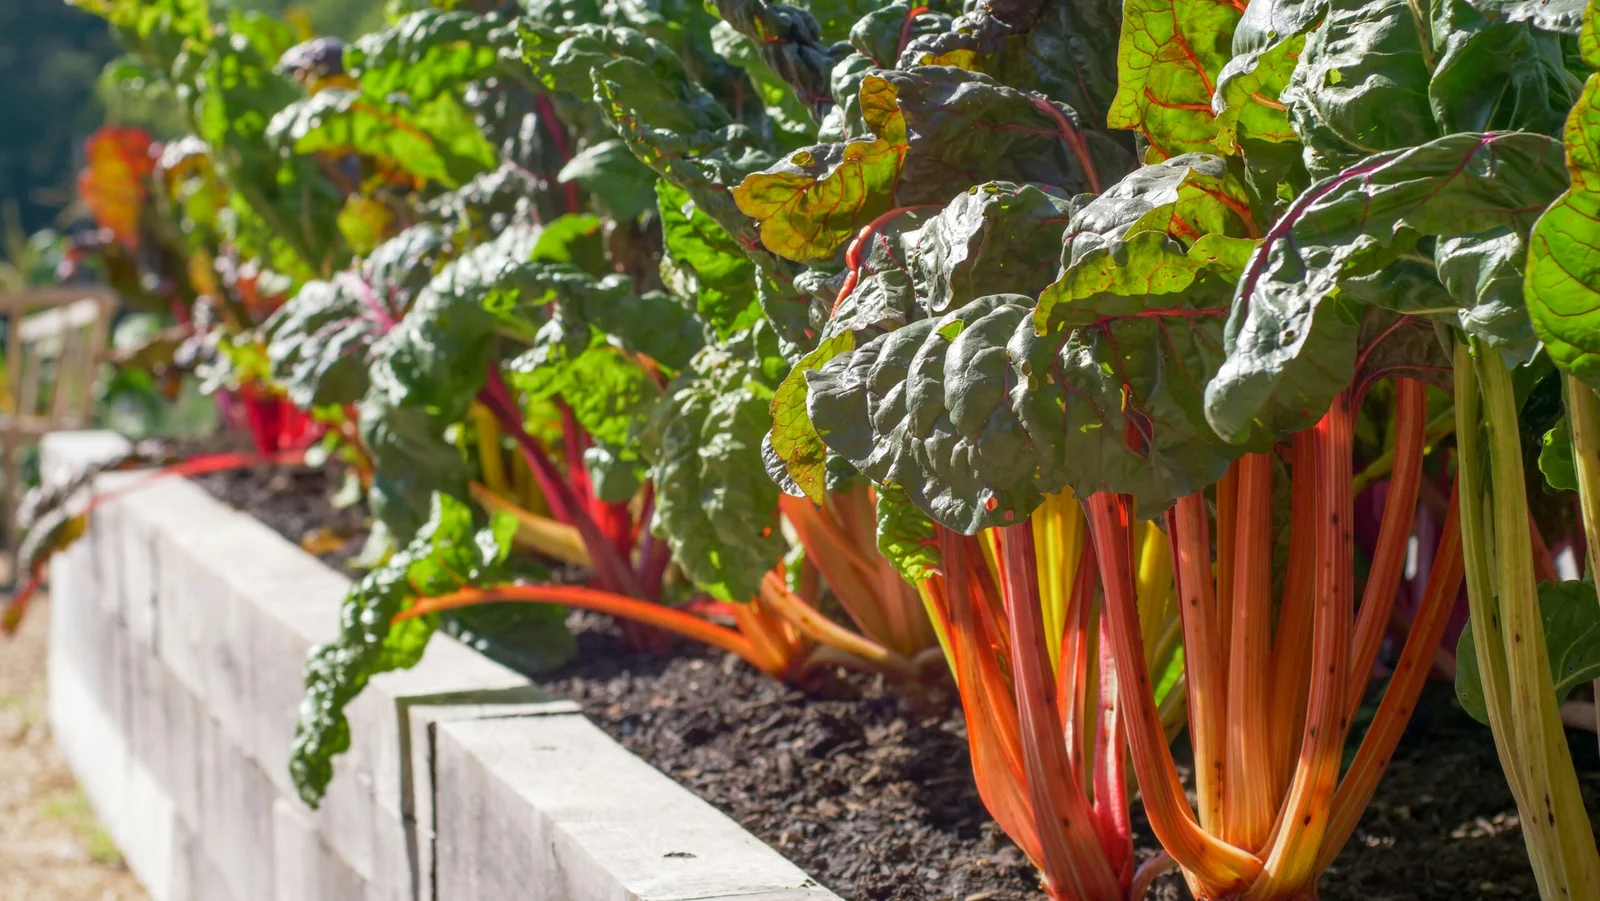
A raised garden bed presents a lot of advantages that would significantly enhance your gardening experience. First, a raised garden bed improve soil quality by providing a controlled environment for your plants. With traditional gardening, your garden would normally struggle with compacted soil, poor drainage or insufficient nutrients. I used to garden the old fashioned way, planting directly in my yard’s soil, dreaming of lush veggies and herbs. But year after year, my crops struggled- stunted carrots, yellowing leaves, and barely- there was harvests. It turned out the soil was nutrient-poor, full of clay and rocks, and holding my plants back.
That’s when I switched to a raised garden bed, and everything changed – healthy plants, happy me! With a raised garden bed, you can fill the structure with high quality soil mixture. This could be tailored specifically for the plants you wish to grow. This will ensure significant growth!
Weed control
Weed control is one of the standout perks of a raised garden bed, and it makes gardening so much more enjoyable. Let’s face it – pulling weeds isn’t everyones favourite chore. But with a raised bed, you’re starting fresh with clean, healthy soil. So you don’t have to deal with all the weed seeds hiding in your yard’s regular dirt. Plus, your raised garden bed is on a raised platform. This means that weeds from your lawn or garden have a harder time sneaking in.
Tips and Tricks
One simple trick is to line the bottom of your raised garden bed with cardboard, newspaper, or landscaping fabric. This creates a barrier that blocks weeds from growing up into your garden. I love using cardboard because it’s free(hello, amazon boxes), easy to work with, and breaks down naturally over time. This is one of my favourite methods to use. On top of the soil, adding a layer of mulch, like straw or wood chips, is a total game changer. It keeps the weeds from sprouting while also helping your soil stay moist, which means less watering for you.
Even if a few weeds do pop up – because let’s be real. They’re persistent. It’s so much easier to pull them out of a raised bed. The soil is soft and loose, so the weeds come out with barely any effort. With less time spent battling weeds, you’ll get to spend more time enjoying your beautiful raised garden bed.
I’ll never forget the relief I felt the first time I planted in my raised garden bed. No more crouching in the dirt for hours. I could just sit on the edge plant my seeds, and enjoy the process without feeling sore afterward. It made gardening feel fun and relaxing again. One of the best things about a raised garden bed is how much easier they are on your body.
Check out this Pro- Tea 4m x 10m landscape fabric. This is the one I used on my raised garden bed. I never complained about my weeds again.

- Need a little help which weed mat to buy? Pro-Tec weed control fabric membranes are all made from 100% VIRGIN materials,…
- 4m x 10m Heavy Duty Woven100gsm made from the best 100% VIRGIN materials ✅
- Minimum 10yrs guarantee below ground ✅

- WEED KILLER The natural way to reduce weeds in your garden, simply spread around your plants to keep the weeds and slugs…
- STRULCH GARDEN MULCH Bulk buy your strulch mulch to keep the compost for outdoor plants weed-free. This garden straw is …
- GARDEN EDGING Strulch mineralised straw mulch and slug deterrant 100L bag is perfect for edging around your plants and b…
Traditional gardening Vs The Raised Garden Bed
Traditional gardening can be tough. The bending, kneeling, and crouching can really take a toll on your back and knees. Which is especially if you’re out there every day. But with a raised garden bed, everything is higher up, so you do not have to hunch over so much. It’s like bringing the garden up to your level!
Plus everything in a raised garden bed is more organised and contained. So you don’t have to spend extra time chasing weeds or hunting through overgrown areas. It’s all right there, neat and manageable, making it a joy to care for. I believe gardening should feel good and you should have a good time doing it. And a raised bed makes sure it does.
Now that we have gone through the benefits. Let us choose an affordable design!
Choosing an Affordable Design for Your Raised Garden Bed
Selecting an affordable design is important if you are on a budget. Various designs are available, each with its own unique features and materials. Some common materials may include wood, recycled pallets, bricks and metal, each offering distinct advantages and disadvantages.
– Your Wooden Raised Garden Bed
A Wooden raised garden bed is so popular because they’re natural, versatile, and they just look great in any garden. Wood blends beautifully plants and feel like an extension of nature. Plus, it is easy to work with, making it a favourite for DIYer. Whether you’re a seasoned builder or someone who’s just getting into gardening.
– Untreated cedar or redwood
Many gardeners swear by untreated cedar or redwood for their raised garden bed as a much cheaper option. These woods are naturally resistant to rot and insects, so they last a long time without the need for chemicals. Plus, they age beautifully , taking on a rustic, silvery- grey colour over time.
– Treated lumber
Since we are on a budget, treated lumber is also an excellent option. Modern treated wood is much safe than it used to be. But you’ll still want to line the inside of the bed with landscaping fabric. This is just to keep the chemicals from leaching into your soil – just to be extra safe.
– Recycled wood
For those eco – conscious gardeners, recycled wood is an amazing choice. Old pallets, dismantled furniture or leftover planks from other projects can be transformed into a charming, unique raised bed. Just make sure the wood hasn’t been treated with anything toxic-if you’re unsure a quick sanding and sealing can help
Personally I’ve used all three types of wood at different times. My first bed was made of cedar, and it’s still standing strong years later. More recently, I’ve built a small garden out of recycled wood from an old bookshelf, and every time I see it, I smile knowing I gave that wood a second life. Whether you go for cedar, redwood, treated lumber, or something recycled, wooden raised beds are a beautiful, practical, and timeless choice for any garden.
– Brick and Metal
We also have some other excellent options for example brick and metal. Brick and metal are fantastic options for your raised garden bed if you’re looking for something durable and stylish. Bricks give a classic, timeless look and are great for creating curved or custom – shaped beds. Furthermore they are easy to work with and can be a more budget friendly option which is what we are looking for today.
Metal beds on the other hand, like those made from galvanised steel, offer more of a sleek and modern vibe and they are built to last which is awesome. Also they are super sturdy, won’t rot or attract pests, and are generally very low maintenance for all those busy bees out there. Whether you go for the rustic charm of bricks or the modern durability of metal, both materials give your garden the long lasting, sturdy foundation it needs.
Step-by-Step Guide to Building Your Raised Garden Bed
Step 1- Choose Your Spot
The first thing to get you started in building your raised garden bed is finding the best location in your yard. Plants, especially vegetables and herbs, need plenty of sunlight – typically 6-8 hours a day – so you must choose a spot that gets consistent sunlight. If you are growing shade – loving plants like lettuce or spinach, partial sun can work too. But how can you check for sunlight? Spend a day observing your yard. Where does the light hit in the morning, afternoon and evening? A simple notebook can help you track the sunny and shady spots, or you can use a sunlight meter if you want to get fancy.
I once set up a raised garden bed near my fence thinking it was sunny enough, but my neighbour’s tree cast shade for most of the afternoon. I ended up having to move it the next season. Always double- check for shadows from trees, fences or buildings. The two most important factors to do with location is drainage and proximity. For drainage look for a spot where water doesn’t pool after rain.
If the water pools excess water saturates preventing oxygen from reaching plant roots. Over time, this can cause the roots to rot, leading to unhealthy or even dying plants. Root rot is particularly dangerous because it often goes unnoticed until it is too late. For proximity keep your raised garden bed close to a water source and your house for convenience. This is because you’re more likely to tend to it regularly if it is within easy reach.
Check out this Digital Light Meter. This solar power energy meter will help you track your sunlight. It will ensure which location has the best sunlight suited for your plant.

- 【Standard Parameter】The solar radiation meter is available in two units: W / m2 and Btu. “OL” is displayed when overload…
- 【Data Retention】This Solar Power Energy Meter This professional solar radiation meter panel is designed with a “HOLD” bu…
- 【Easy to Use】This Solar Radiation Meter Direct measurement without adjustment, long-term stable measurement. Pay attenti…
Step 2: Choose Your Materials
Secondly, we need to choose the type of material that we need. Your material is one of the most important factors in building your raised garden bed. This is because this determines how it looks, how long it lasts and how much it costs. So lets dig in!
Pine
If your looking for a budget friendly material that is perfect for starting your raised garden journey, pine wood would be one of the most excellent choices. One of the biggest advantages is that it is affordable which is what we like. It is also easy to work with, and widely available, making it the go to option for gardeners on a budget. But what makes it so great?
Why choose pine?
Pine is one of the most cost-effective materials for raised beds. You can find it at any local hardware store, and it is often sold in convenient pre-cut sizes, making it beginner- friendly. This is especially helpful if you are just getting into gardening and aren’t ready to invest a lot upfront. One of the main reasons why it saves you money is because pine is a fast- growing tree, making it more abundant and cheaper to harvest. Because it is so widely available, you’ll often find it on sale which is one of things we live up for!
My very first raised garden bed was made from untreated pine, and I couldn’t have been happier with the results. It was a weekend project with a small budget and it gave me the confidence to grow my first batch of vegetables. Sure, the wood needed replacing after a few years, but by then, I’d learned so much about gardening that upgrading felt like a reward for my efforts
Why is pine easy to work with?
Pine is also incredibly easy to work with, making it perfect for your DIY raised garden bed, especially for beginners. Furthermore, its lightweight nature means you can transport and position the boards without breaking a sweat, even if you’re working alone. As a softwood, pine is simple to cut with basic tools like a hand saw or circular saw- no need for expensive equipment or advanced skills. Drilling and assembling is a breeze too, as pine holds screws securely without splitting or cracking easily which is awesome. Whether you’re cutting size, making adjustments, or piercing it all together, pine keeps the process smooth, manageable, and stress – free.
What to know about pine?
While pine is budget- friendly and functional it has a shorter lifespan than more expensive woods like cedar. Typically, untreated pine will last around 3-5 years before it starts to show signs of rot. However there are ways to extend its life.
You could:
- Line the Inside: Staple landscaping fabric or a heavy – duty plastic liner inside the bed to protect the wood from constant soil contact
- Raise It Off the Ground: Elevate the bed slightly with bricks or small blocks to keep the base dry and prevent moisture buildup
- Seal the Wood: Use a non toxic wood sealant to add an extra layer of protection without compromising the safety of your soil.
Reclaimed wood
A budget – friendly and eco- conscious option for your raised garden bed is reclaimed wood, which you can often find for free or a very low cost. Old pallets, shipping crates, or leftover lumber from construction sites or renovations are all great places to look. Many businesses are happy to let you take these materials off their hands, saving them the hassle of disposal. The weathered textures and unique imperfections of reclaimed wood add a rustic charm to your garden creating a distinctive aesthetic that new materials can’t replicate. Working with reclaimed wood is straightforward.
First, start with giving the wood a good scrub to remove dirt, then sand down any rough edges to make it safe to handle. After, you can cut it to size with simple tools like a handsaw or circular saw, and assembly is straightforward with screws or nails. One important step is to inspect the wood carefully to ensure it hasn’t been treated with harmful chemicals or covered in unsafe paint, especially if you’re growing vegetables. That would be extremely unpleasant.
Reclaimed wood is not just easy on your wallet- it’s also good for the environment. By repurposing wood that might otherwise end up in a landfill, your reducing waste and giving new life to old materials. Whether you’re a beginner or a seasoned gardener, using reclaimed wood adds character to your garden while helping you stay on budget.

Step 3 – Measure and cut
Step 1:
Now that you have your materials, the next step is measuring and cutting the pieces to the right size. This part can feel a bit intimidating, but don’t worry-it’s actually pretty straightforward once you break it down. Start by choosing the dimensions for your garden bed. A common size is 4 feet by 8 feet, which provides plenty of space for plants without being too overwhelming to build. However, the size is entirely up to you and your available space, so feel free to adjust. Take a tape measure and carefully measure the length and width for each side.
Step 2:
Once you’ve decided on your dimensions, mark where you’ll make the cuts using a pencil or chalk, ensuring your measurements are consistent on all pieces. Taking a little extra time here to measure twice will pay off later, saving you the frustration of having uneven sides or having to fix mistakes. It is also helpful to measure each piece against the others as you go ensure everything aligns properly. You don’t need to be perfect, but getting your measurements right will make the whole project much easier and ensure a neat, sturdy bed.


Step 3:
When it’s time to cut, you’ll need a saw- either a handsaw or circular saw will work fine. If you’ve never used one before, don’t worry: both are fairly easy to handle with a little patience. For handsaws, make sure you’re cutting in a straight line, following your pencil marks, and taking your tie. For circular saws, be sure to set the depth of the blade just enough to cut through the thickness of the wood and follow the marked lines carefully.
If you’re worried about making uneven cuts, you can use a carpenter’s square or a straight edge as a guide, which helps keep your saw on track. If you’re working with thicker boards or pieces that are a bit warped, you might need to adjust your grip or cut slowly to make sure you’re staying aligned. Once all your pieces are cut, give them a quick check to make sure everything fits together well before moving on to assembly. With each cut, you’re one step closer to building your perfect garden bed, and the satisfaction of seeing it take shape is totally worth the effort!
Step 4- Assemble the bed
Now comes the exciting part- bringing your garden bed to life! Lets dig in:
- Lay out the pieces: Start by placing your wood pieces on the ground in a rectangular shape. This helps you visualise the final structure and ensures everything aligns properly. If your boards are a little twisted(which is common with reclaimed wood), don’t stress- it’s all part of the rustic charm! Adjust and arrange them until they sit as evenly as possible
- Secure the corners: Once you’re happy with the layout, attach the corners. Use screws and a drill to join the boards together at right angles. If you do not have a drill, a hammer and nails will work too – it just takes a bit more of your effort. For extra stability, especially if your bed is larger, consider adding metal corner brackets. These brackets help keep the frame sturdy and prevent it from bowing out under the weight of the soil.
- Reinforce the frame: If your bed is more than 4 feet long, adding a cross support in the middle can help keep the sides from bulging over time. Use a scrap piece of wood and secure it horizontally across the middle of the longer sides. This small extra step can make a big difference in the durability of the bed.

- 【3-mode Hammer Drill Operation System, Torque 42N.m】The combi drill driver breaks the limits of single mode, this cordle…
- 【25 Position Clutch & 2 Speed Gearbox】This Cordless Drill can be set to operate in two different speed ranges (0-550RPM,…
- 【Quick Chuck & Easy to Use】3/8″ (10mm) auto lock chuck helps you change drills more quickly. Rubber grips provide you wi…
My First Garden Bed
I remember building my first garden bed and feeling so proud as I tightened the last screw. But here’s a tip from experience: take your time with this step. On my first try, I rushed through attaching the corners, and when I went to move the bed into place, the whole thing wobbled and one corner came loose! I ended up having to take it apart again, which taught me to double check each joint before moving forward. Once you’ve secured all the piece, give the frame a gentle shake to make sure everything is solid.
If your garden spot isn’t perfectly flat, you might need to dig down slightly to level the bed before filling it. This can make a big difference in the final look and function of your garden. Seeing the assembled bed sitting in its spot, ready to be filled, is such a rewarding moment- it is the step where all your hard work starts to pay off, and your project really starts to take its shape!
5 – Fill Your Bed and Add the Finishing Touches
This is here your garden bed truly comes to life! Before adding soil, take a moment to think about protecting your hard work. Lining the inside edges of your bed with landscape fabric or scraps of wood is an easy way to stop soil from washing out through the cracks, especially during heavy rain. It also helps keep the wood in good shape by reducing how much moisture it absorbs. If weeds are your sworn enemy (aren’t they all?), add a layer of fabric underneath the entire bed to block them while still letting water drain naturally.
Now comes the fun part – filling it up! Start with a base layer of gravel or small rocks for drainage (if your yard tends to hold water), then add a rich mix of soil and compost to give your plants the best start. I remember when I filled my raised garden bed – I had no idea how much soil I’d need, so I ended up running back and forth to the store 3 times! I laughed about it later, but now I’d always plan ahead and get a little extra. Once you’ve smoothed out the soil, step back and take it in.
It is such a satisfying feeling to see the bed ready to grow fresh veggies, herbs or flowers. You’ve now turned a pile of wood into something beautiful and useful! Well done – you’re officially a gardener!

- 𝐅𝐎𝐑𝐌𝐔𝐋𝐀𝐓𝐄𝐃 𝐅𝐎𝐑 𝐇𝐄𝐀𝐋𝐓𝐇𝐘 𝐏𝐋𝐀𝐍𝐓𝐒 – Ideal for house plants and garden use, our compost is rich in non-recycled organic matte…
- 𝐒𝐋𝐎𝐖 𝐑𝐄𝐋𝐄𝐀𝐒𝐄 𝐅𝐄𝐑𝐓𝐈𝐋𝐈𝐒𝐄𝐑 – Formulated to optimise plant growth, this compost serves as a rich seed compost and houseplant…
- 𝐀𝐋𝐋 𝐒𝐄𝐀𝐒𝐎𝐍 𝐔𝐒𝐄 – A perfect soil for plants indoors and potting compost for outdoor pots. It can be used all year round f…
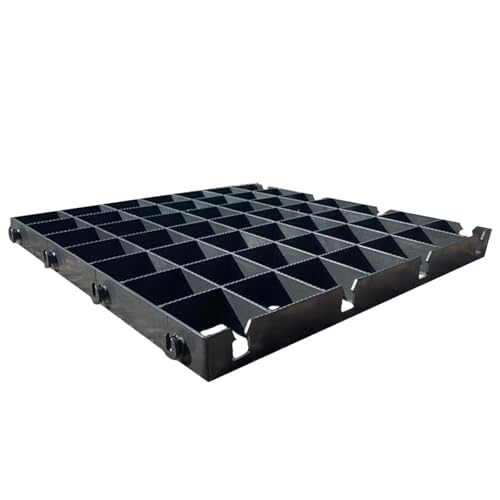
- DURABLE AND HIGH-STRENGTH DESIGN: ECODECK 40 mm Grid is crafted from recycled, injection-moulded, UV-stabled premium pla…
- QUICK AND SIMPLE TO INSTALL: With the simple push- snap fixing system, you can easily connect the grids using jigsaw-sty…
- HEAVY-DUTY VEHICLE SUPPORT: Designed to handle vehicles up to 25 tonnes, including cars, vans, and lorries, making it pe…
Tips for Budget-Friendly Soil and Plant Selection
If you’re building a raised garden bed on a budget, choosing the right soil mix is key to growing happy, healthy plants without breaking the bank. A super affordable and effective option is to mix compost, topsoil, and mulch. Compost is like a nutrient-packed superfood for your plants, topsoil gives them a solid foundation to grow in, and mulch helps lock in moisture and keep pesky weeds at bay. Together, they create a healthy, thriving environment for your garden to flourish!
Local Suppliers
When gathering materials for your raised garden bed, check out local suppliers—you might find compost or topsoil at a discount or even for free! Better yet, start your own compost pile at home using kitchen scraps and yard waste. It’s an easy, budget-friendly way to recycle and boost sustainability. Plus, homemade compost is a goldmine for improving soil structure and fertility, giving your garden the best chance to thrive. It’s good for your plants, your wallet, and the planet!
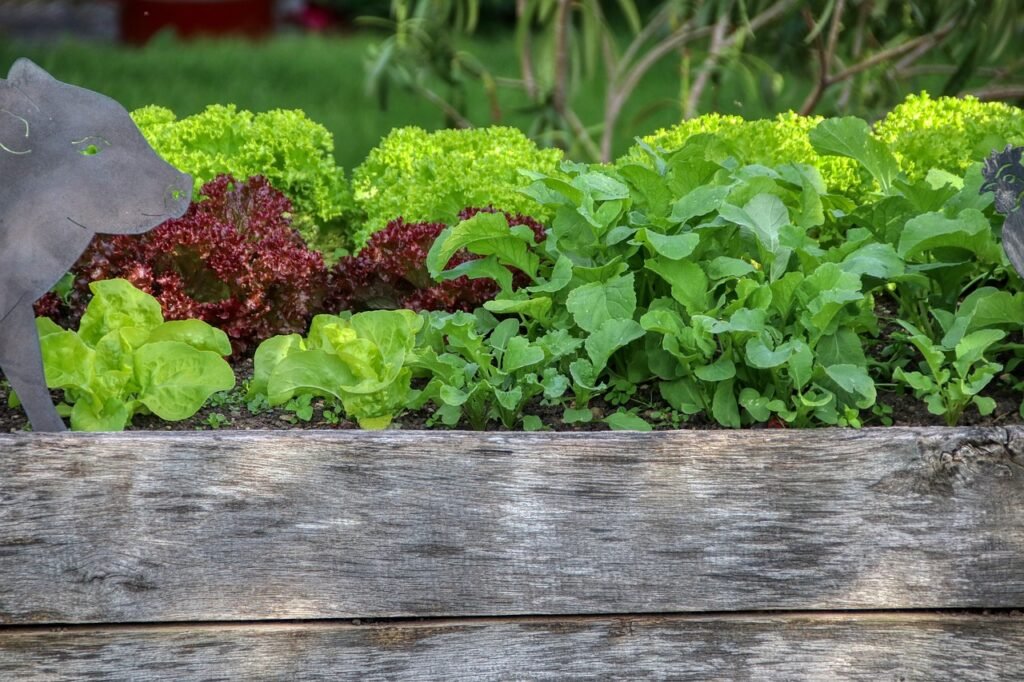
Choosing the Right Species
In terms of plant selection, choosing the right species can significantly impact your gardening success without straining your budget. It’s advisable to start with seeds rather than transplants, as they are generally cheaper and offer a greater variety. Look for seeds that are suitable for your climate and can thrive in raised beds, such as radishes, lettuce, and bush beans. These plants not only grow quickly, but they also yield a substantial harvest with minimal investment.
Seasonal Planting
Furthermore, consider seasonal planting to optimize space and resources. By planting in succession and utilizing companion planting techniques, you can maximize your garden’s productivity. For example, pairing fast-growing crops like radishes with slower-growing ones like carrots can make effective use of the space, allowing you to harvest in waves throughout the growing season. Taking these budget-friendly approaches will help ensure a successful and fruitful gardening experience in your DIY raised garden bed.

- Easy Grip Handles
- Sturdy and Durable Wheel
- 85 Litre Water holding capacity